SPEAKER PLATE
We have created step by step video tutorials to walk you through the process of setting up your Speaker Plate and connecting your receivers to your surround sound or stereo speaker system. This tutorial is important for clients that have only purchased pre-wire through Sight & Sound Systems. If you have a Sight & Sound account you can see the options that will benefit from this tutorial here.
So what is your speaker plate?
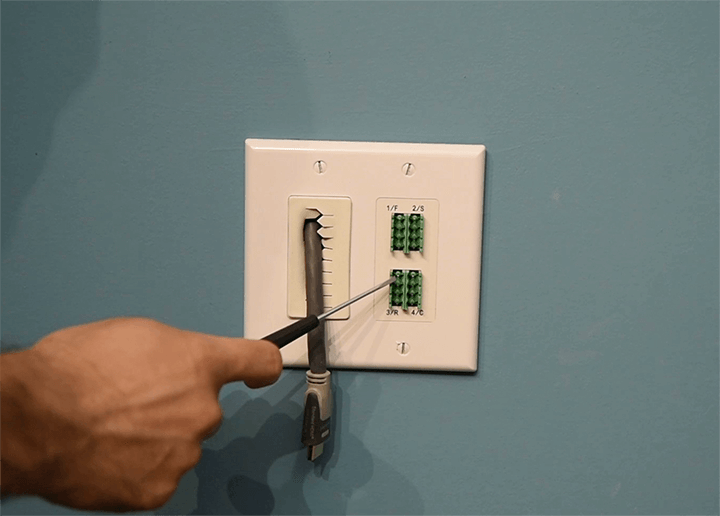
Your speaker plate is essentially a fancy way of organizing the speaker cable that is connected to your in-wall or in-ceiling speakers. Instead of having an ugly little hole with cables dangling out of your drywall, Sight & Sound created a faceplate that organizes the speaker cable by zones and disguises them to almost look like an electrical outlet. We usually locate the speaker plate where you plan to setup your entertainment center, i.e. TV, Xbox, Blue Ray player.
Part 1
Choosing and Preparing Your Speaker Cable
You want to start off with 16 gauge speaker cable. It can be either 2 component or 4 component cables. You will then need to strip the outer tubing layer off of the end of each cable to find smaller colored cables within the tubing. Follow this step by stripping a half inch of the plastic coating off of the smaller colored wires.
Part 2
Connecting Your Speaker Cable to the Proper Speaker Plate Zones
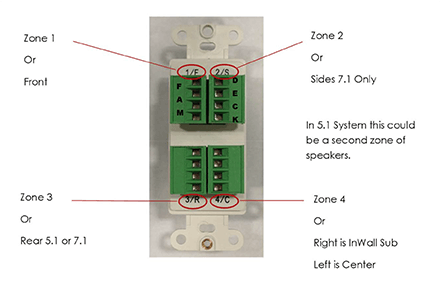
Now that your cables are set up, you can connect them to your speaker plate. Follow the diagram below for what each zone of the speaker plate is for. Then connect your cables accordingly.

Part 3
Connecting Your Speaker Cable to Your Receiver
Once your cables have been properly setup and connected to the plate, you will connect your speaker cables to your receiver. You may also connect your subwoofer, any HDMI cables, and other consoles to your receiver at this time.
We hope this tutorial was easy for you to follow! Please leave any comments or questions you may have below and we will get back to you as soon as possible.
